
|
Jenkins for C++ Project |
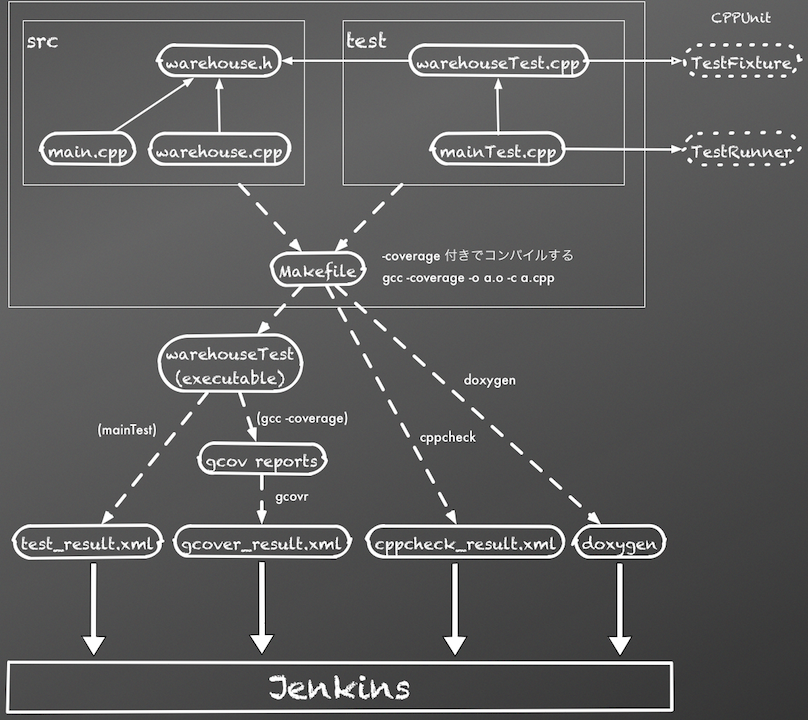
Jenkins で C++ プロジェクトを管理するにはどうすればよいか?
#include <stdio.h>

int main ( ) {
    printf( "hello!\n" );
    return 0;
}
#ifndef WAREHOUSE_H__
#define WAREHOUSE_H__

class Warehouse {
private:
	int stock;
public:
	Warehouse();
	void putGoods(int amount);
	int takeGoods(int amount);
	int getStock();
};

#endif
#include "warehouse.h"

Warehouse::Warehouse() {
	stock = 0;
}

void Warehouse::putGoods(int amount){
	stock += amount;
}

int Warehouse::takeGoods(int amount){
	if (stock >= amount) {
		stock -= amount;
		return amount;
	}
	int tmp;
	tmp = stock;
	stock = 0;
	return tmp;
}

int Warehouse::getStock() {
	return stock;
}
#include "warehouse.h"
#include <cppunit/extensions/HelperMacros.h>

using namespace CPPUNIT_NS;

class warehouseTest : public TestFixture {
    CPPUNIT_TEST_SUITE(warehouseTest);
    CPPUNIT_TEST(test1);
    CPPUNIT_TEST(test2);
    CPPUNIT_TEST_SUITE_END();

    void test1(){
    	Warehouse *w = new Warehouse();
    	w->putGoods(100);
        CPPUNIT_ASSERT( 25 == w->takeGoods(25) );
        CPPUNIT_ASSERT( 75 == w->getStock() );
        delete w;
    }

    void test2(){
    	Warehouse *w = new Warehouse();
    	w->putGoods(100);
        CPPUNIT_ASSERT( 100 == w->takeGoods(1000) );
        CPPUNIT_ASSERT( 0 == w->getStock() );
        delete w;
    }
};

CPPUNIT_TEST_SUITE_REGISTRATION(warehouseTest);
#include <cppunit/TestResult.h>
#include <cppunit/TestResultCollector.h>
#include <cppunit/BriefTestProgressListener.h>
#include <cppunit/TestRunner.h>
#include <cppunit/extensions/TestFactoryRegistry.h>
#include <cppunit/CompilerOutputter.h>
#include <cppunit/XmlOutputter.h>

using namespace CPPUNIT_NS;

int main(int argc, char **argv) {
    TestResult controller;
    TestResultCollector result;
    controller.addListener(&result);

    BriefTestProgressListener progress;
    controller.addListener(&progress);

    TestRunner runner;
    runner.addTest(TestFactoryRegistry::getRegistry().makeTest());
    runner.run(controller);

    // compiler output
    CompilerOutputter coutputter(&result, stdCOut());
    coutputter.write();

    // output test result for jenkins
    std::ofstream ofs("test_result.xml");
    CPPUNIT_NS::XmlOutputter outputter(&result, ofs,"UTF-8");
    outputter.write();

    return result.wasSuccessful() ? 0 : 1;
}
APPNAME=warehouse
APPMAIN=./src/main.cpp
TESTMAIN=warehouseTest
###########################################################################
# Which compiler
CC=g++
FC=g77
###########################################################################
# Where to install
TARGET=./
###########################################################################
# Where are include files kept
LIBS=-lcppunit
INCLUDES=-I./src -I./test
###########################################################################
# Compile option
CFLAGS=-g -Wall -coverage

SRC:=$(filter-out $(APPMAIN),$(wildcard ./src/*.cpp))
TEST:=$(wildcard ./test/*.cpp)
OBJ:=$(SRC:.cpp=.o) $(TEST:.cpp=.o)

###########################################################################
# Control Script
all: clean compile report
clean:
	find ./ -name *.o -exec rm -v {} \;
	find ./ -name *.gcno -exec rm -v {} \;
	find ./ -name *.gcda -exec rm -v {} \;
	-rm $(APPNAME)
	-rm $(TESTMAIN)
	-rm *_result.xml
	-rm doxygen_*
	-rm -rf html
	-rm -rf latex

###########################################################################
# Body
compile: $(OBJ)
	$(CC) $(CFLAGS) $(OBJ) -o $(TESTMAIN) $(LIBS)

%.o : %.cpp
	$(CC) $(CFLAGS) $(LIBS) $(INCLUDES) -c $< -o $@

report:
	./$(TESTMAIN)
	gcovr --xml --output=gcover_result.xml src/
	cppcheck --enable=all --xml src 2> cppcheck_result.xml
	doxygen doxygen.conf > /dev/null
$ doxygen -g doxygen.conf
で、設定ファイルのひな形ができる。doxygen.conf を修正する。たとえば、
$ diff -u doxygen.conf.org doxygen.conf
--- doxygen.conf.org
+++ doxygen.conf
@@ -409,7 +409,7 @@
 # normally produced when WARNINGS is set to YES.
 # The default value is: NO.

-EXTRACT_ALL            = NO
+EXTRACT_ALL            = YES

 # If the EXTRACT_PRIVATE tag is set to YES, all private members of a class will
 # be included in the documentation.
@@ -758,7 +758,7 @@
 # spaces.
 # Note: If this tag is empty the current directory is searched.

-INPUT                  =
+INPUT                  = src

 # This tag can be used to specify the character encoding of the source files
 # that doxygen parses. Internally doxygen uses the UTF-8 encoding. Doxygen uses
$ make
g++ -g -Wall -coverage -lcppunit -I./src -I./test -c src/warehouse.cpp -o src/warehouse.o
g++ -g -Wall -coverage -lcppunit -I./src -I./test -c test/warehouseTest.cpp -o test/warehouseTest.o
g++ -g -Wall -coverage -lcppunit -I./src -I./test -c test/mainTest.cpp -o test/mainTest.o
g++ -g -Wall -coverage ./src/warehouse.o ./test/warehouseTest.o ./test/mainTest.o -o warehouseTest -lcppunit
./warehouseTest
warehouseTest::test1 : OK
warehouseTest::test2 : OK
OK (2)
gcovr --xml --output=gcover_result.xml src/
cppcheck --enable=all --xml src 2> cppcheck_result.xml
Checking src/main.cpp...
1/2 files checked 19% done
Checking src/warehouse.cpp...
2/2 files checked 100% done
Checking usage of global functions..
doxygen doxygen.conf > /dev/null

$ ls
Makefile             doxygen.conf      doxygen_sqlite3.db  html   src   test_result.xml
cppcheck_result.xml  doxygen.conf.org  gcover_result.xml   latex  test  warehouseTest
まぁ、ちゃんと動いたんじゃないでしょうか
FROM jenkins

USER root

RUN apt-get -y update && apt-get -y upgrade

# install gcc g++ gfortran
RUN apt-get -y install build-essential

# install static analysis
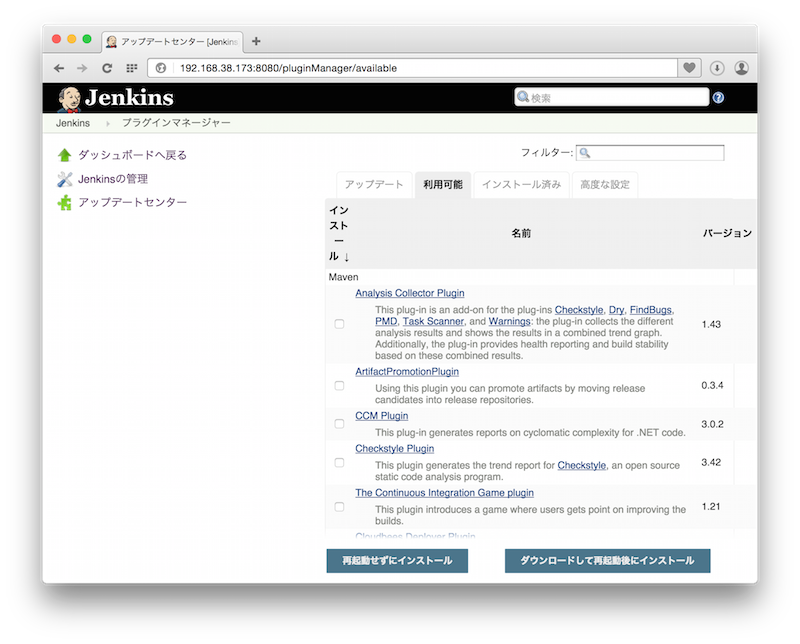
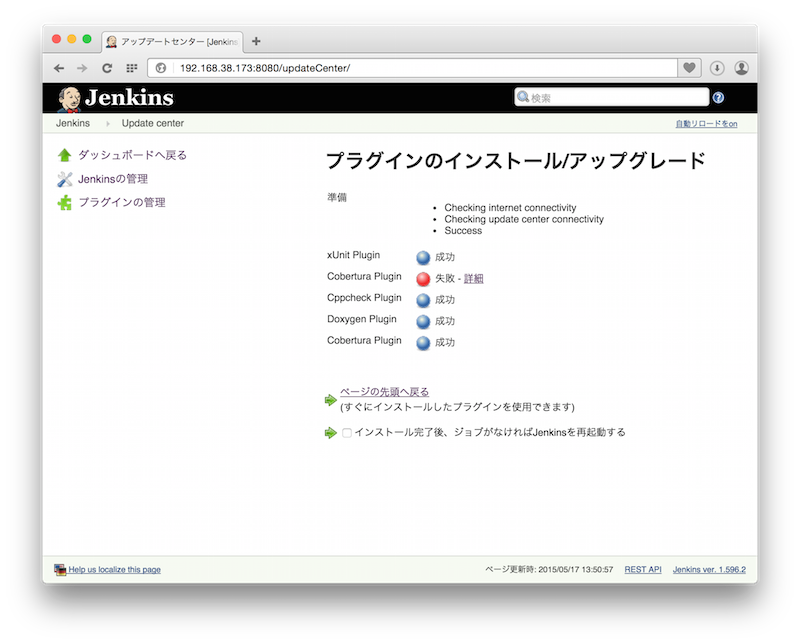
RUN apt-get -y install cppcheck libcppunit* gcovr
RUN apt-get -y install doxygen graphviz

# install japanese fonts for many charts on jenkins
RUN apt-get -y install fonts-ipafont

WORKDIR /usr/lib/jvm/java-7-openjdk-amd64/jre/lib/fonts
RUN mkdir fallback
RUN cd fallback && ln -s /usr/share/fonts/opentype/ipafont-gothic/ipag.ttf
RUN cd fallback && ln -s /usr/share/fonts/opentype/ipafont-gothic/ipam.ttf
# RUN cd fallback && pwd && ls -la
WORKDIR /

USER jenkins
#!/bin/bash

docker build -t atsushi/jenkins ./
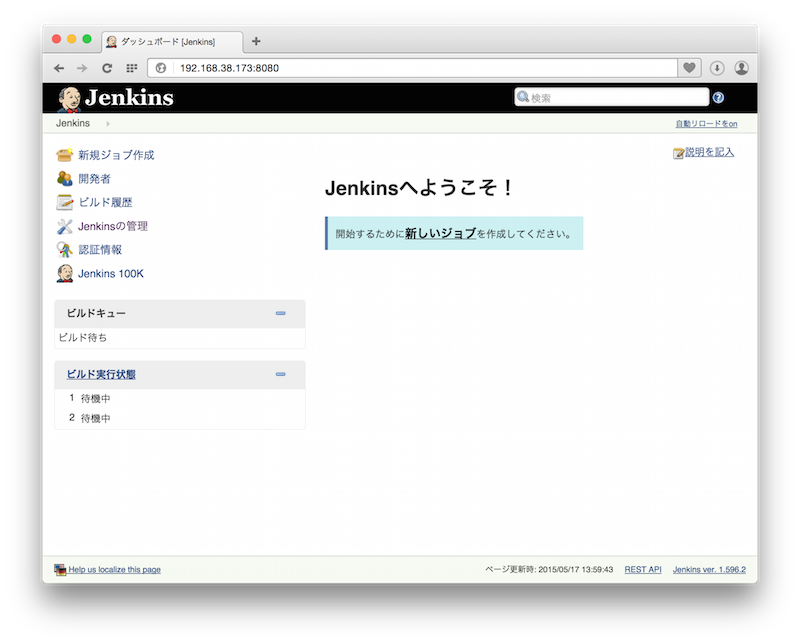
$ sudo mkdir /var/jenkins_home
$ sudo chown 1000 /var/jenkins_home/
#!/bin/bash

docker run -p 8080:8080 -v /var/jenkins_home:/var/jenkins_home atsushi/jenkins
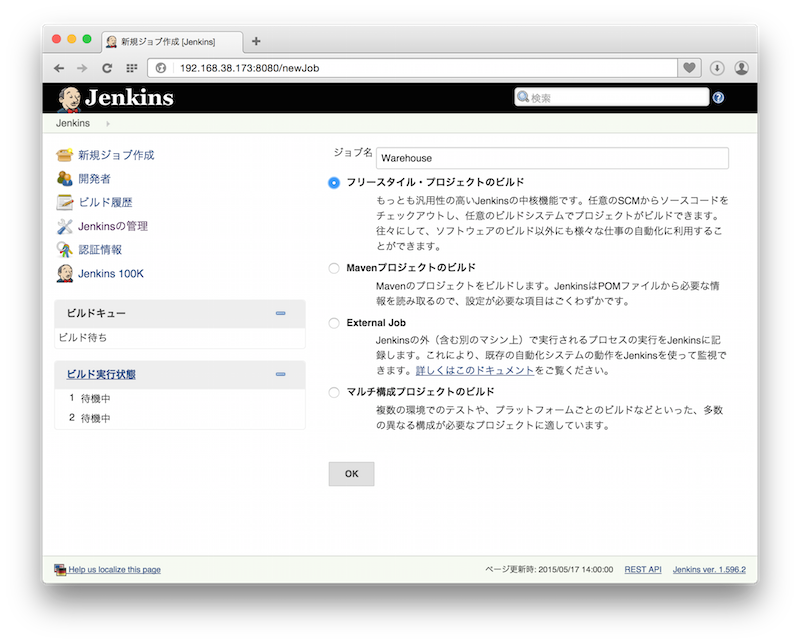
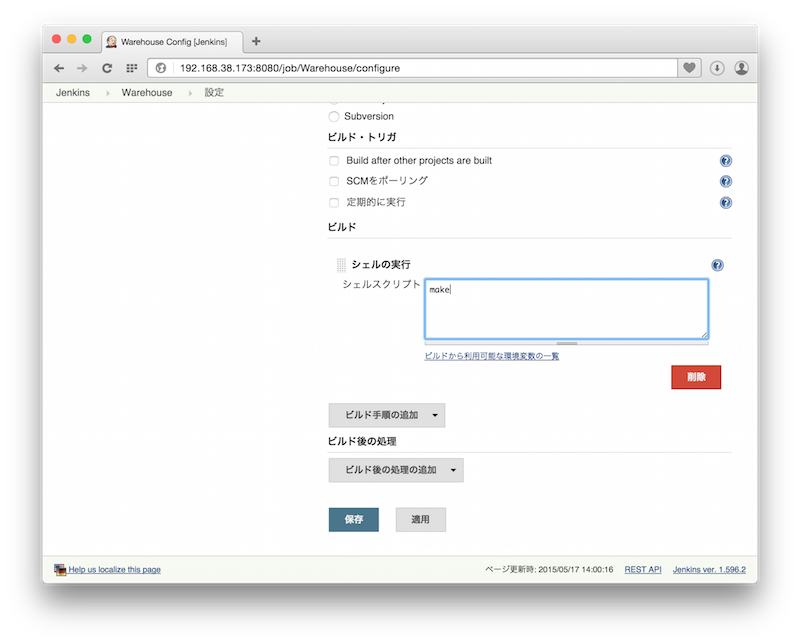
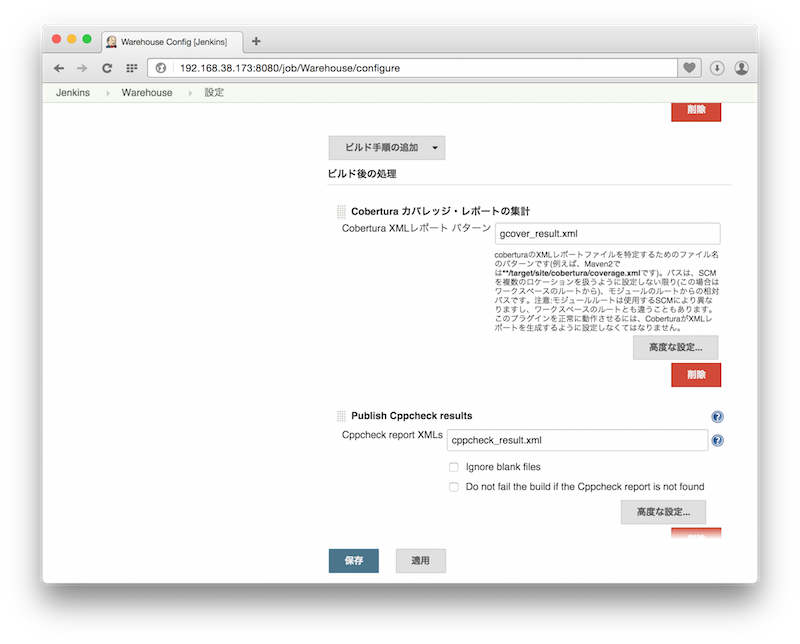
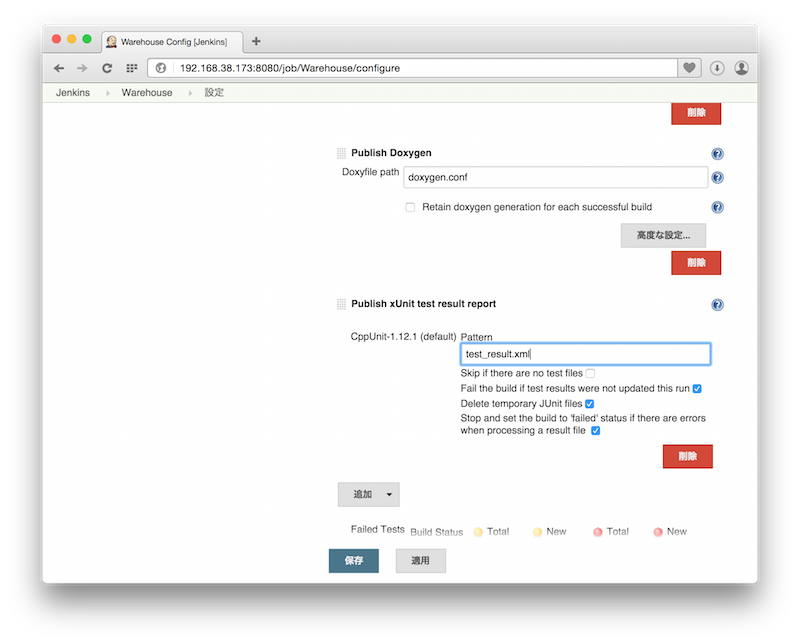
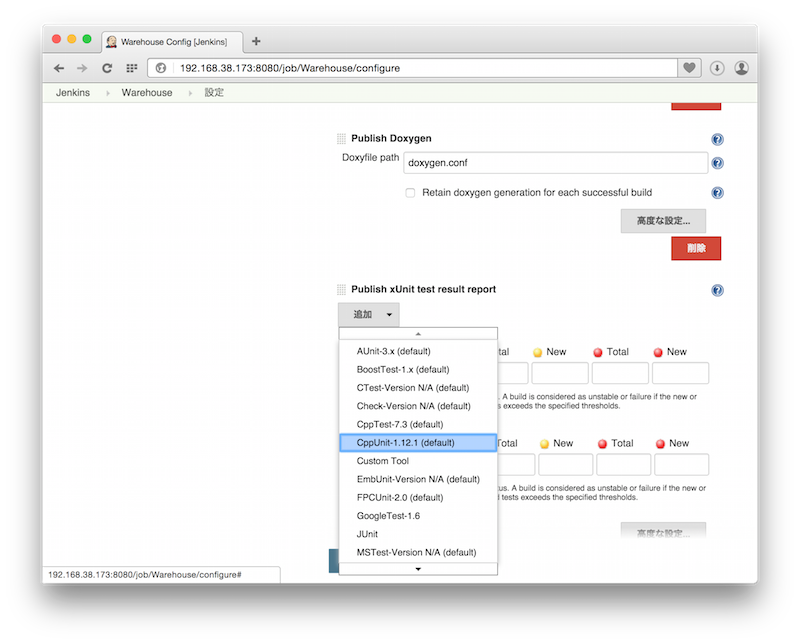
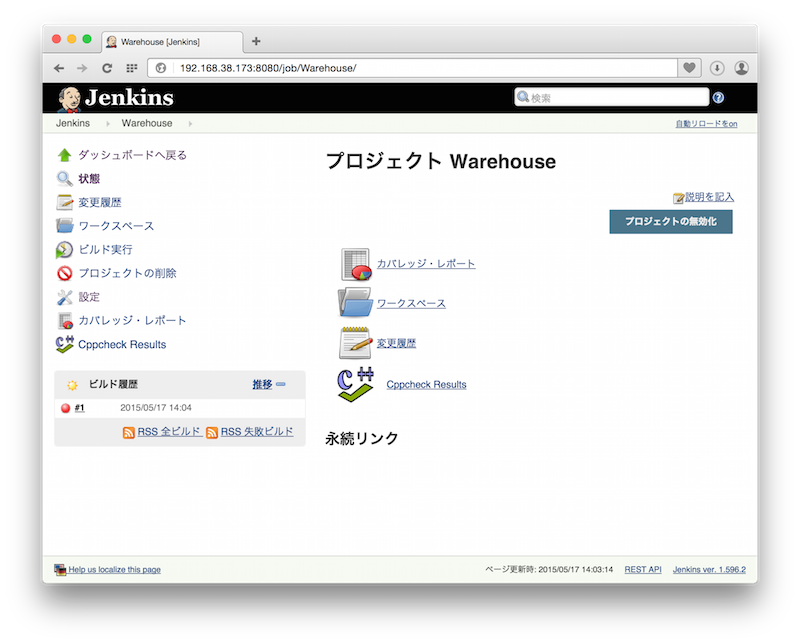
$ cp -vR ~/DockerExam/jenkins/WarehouseCpp/* /var/jenkins_home/jobs/Warehouse/workspace/
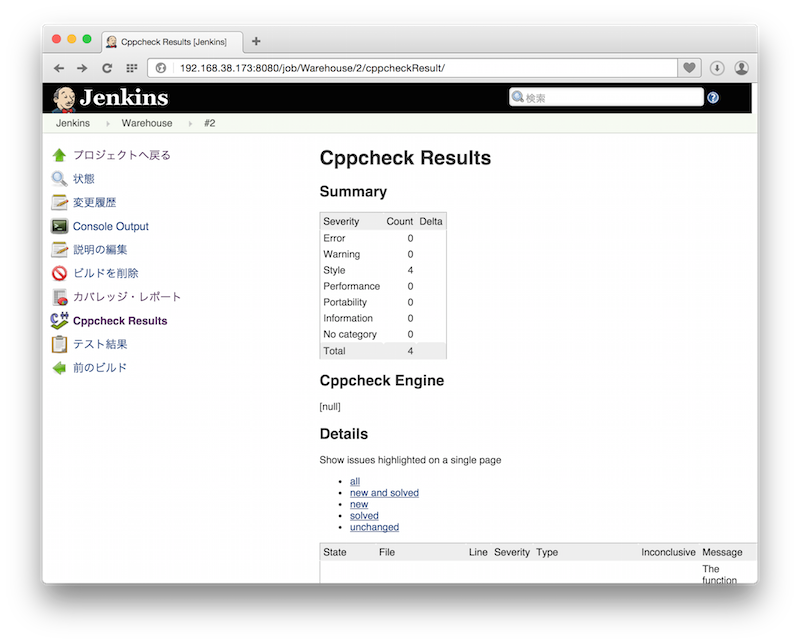
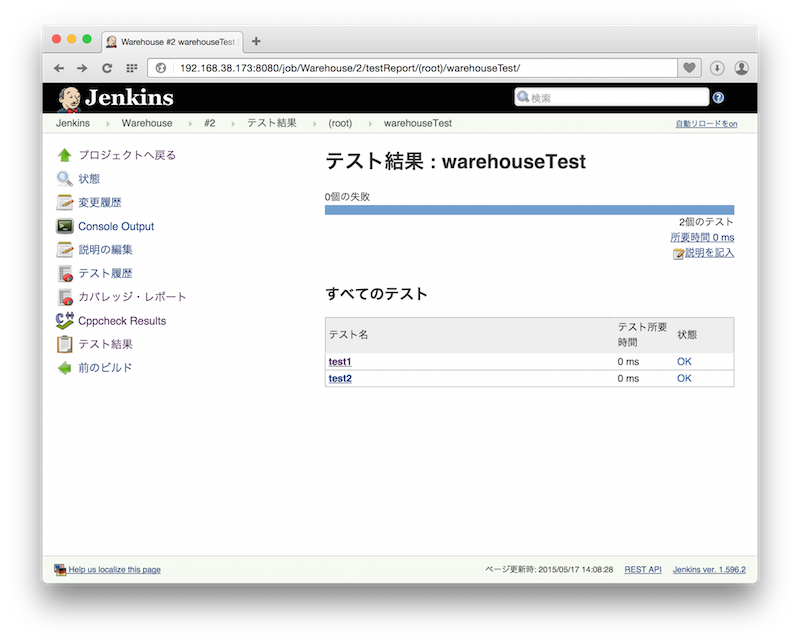
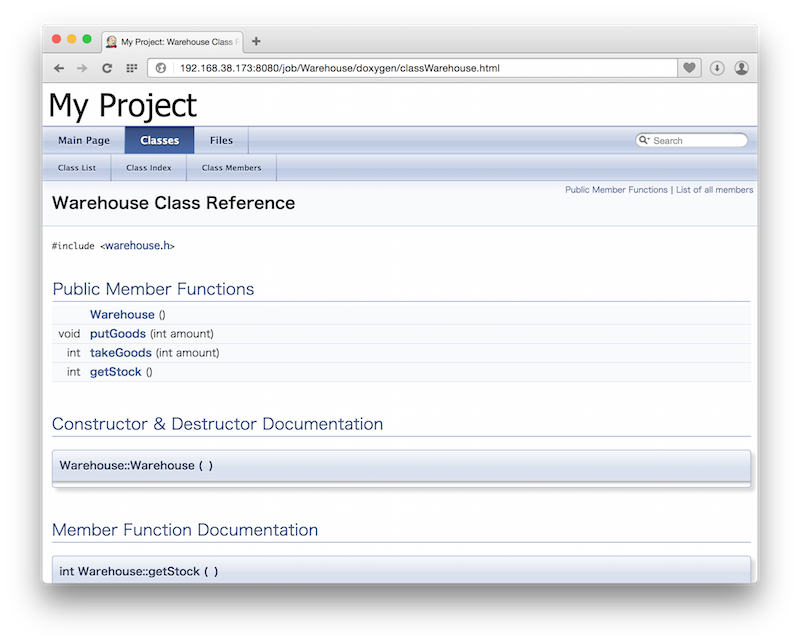
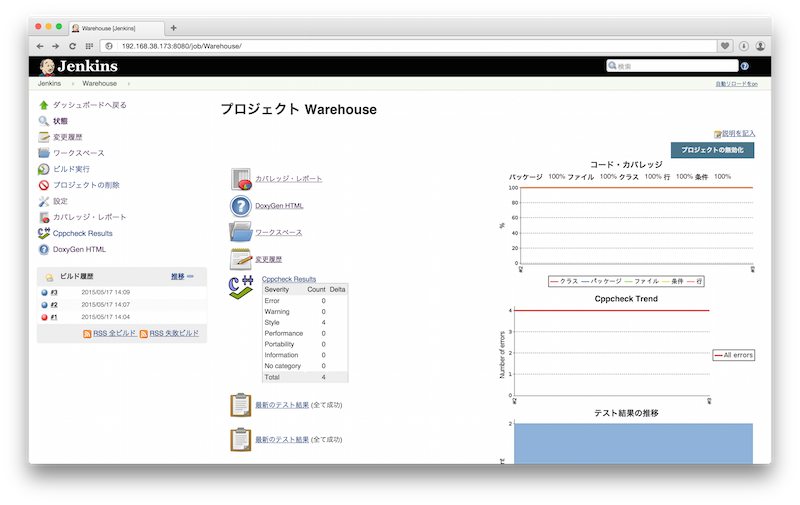
 build06.png 2500件
[詳細]
 build05.png 2481件
[詳細]
 build04.png 2665件
[詳細]
 build03.png 2512件
[詳細]
 build02.png 2615件
[詳細]
 build01.png 2520件
[詳細]
 job07.png 2266件
[詳細]
 job06.png 2225件
[詳細]
 job05.png 2372件
[詳細]
 job04.png 2276件
[詳細]
 job03.png 2262件
[詳細]
 job02.png 2074件
[詳細]
 job01.png 2062件
[詳細]
 plugin02.png 2092件
[詳細]
 plugin01.png 2104件
[詳細]
 Jenkins_CPP.graffle 1137件
[詳細]
 Jenkins_CPP.png 2504件
[詳細]


